


Modern email service providers and email marketing metrics are very robust. They give you tons of ways to measure how well your emails perform and how people engage with them.
However, once people click through on your emails, they leave your email marketing environment. They go to your website, social media business page, or even hop on the phone with someone from your business.
So it’s critical that you’re able to track where people go once they’ve clicked through on an email, with information about where they came from. Otherwise, you end up with several buckets of traffic data, without much information about how these sets of traffic data are related.
That’s why you need Google Analytics UTM parameters.
Google Analytics UTM parameters: What are they?
Google UTM (Urchin Tracking Module) Parameters are digital tracking codes that show you where each visitor came from when they arrive on your website, social media profile, landing pages, and other online marketing assets.
When a person clicks a link that’s built using UTM parameters, the UTM code in the URL tells you where that person came from. So, if a person visits your website, the UTM parameters will tell you whether that person came from an email or some other online marketing channel.
In short, UTM codes tell you the source of any traffic on any of your marketing channels. And using UTM codes in email enables email marketers to see how much traffic is essentially referrals from their email marketing efforts.
So understanding your traffic sources is valuable for all your online marketing. But it’s especially useful for email marketing.
How UTM parameters help you improve your email marketing
Sometimes there’s a direct link between a marketing email and the sale. Your subscriber gets an email, sees something they like, then clicks on the call-to-action (CTA) and makes a purchase. It’s super easy to attribute the sale to your email in these cases.
But, more often, the ecommerce purchase process is a much longer, more complex path.
The long path to purchase
A more common scenario is that a customer gets an email, sees something they like, click-through to your website…
Then they go to your social media page to read comments and reviews about your products and company. They head back to your website to consider the purchase again. Then they forget about it and get back to work until they see your email in their inbox later.
You get the idea. It’s far more common for the purchase path to look something like this:
Email > website > social media page > Google reviews > blog post > website > purchase
In this more indirect purchase path, it’s much harder to assess the value of the email. Without Google Analytics UTM parameters, the purchase above might get attributed to your blog or classified as search engine traffic.
But your email got the whole chain started. And, if you know that, you have far more insight into which of your emails and email campaigns are most profitable.
If you don’t know which emails are sparking these longer purchase processes, you risk shutting down profitable email campaigns to dedicate more resources to the last step in the purchase process. And that last step won’t work without the supporting email that got the whole process started.
The bottom line is that there’s no way to accurately assess your email marketing efforts without Google UTM parameters. And that might lead you to make bad marketing decisions that cut off the source of your sales and decrease your revenue.
Fortunately, UTM codes are fairly easy to use.
How to use UTM parameters in your email campaigns
As you may have guessed from the name, you need a Google Analytics account to use Google Analytics UTM parameters. If you need to create an account, Google will walk you through the process.
Once you have a Google Analytics account, you can use the Google Analytics URL builder to create URLs to use as the links in your emails.
Use the Google Analytics URL builder to create tagged URLs
The Google Analytics URL builder adds the UTM tag to your URLs. The UTM tag is unique and identifies which campaign and email each click of email traffic comes from.
This UTM tag identifies the source of every click in your emails. The tag enables you to see where people go once they click-through on your emails.
But the campaign URL Builder needs some information from you to generate the right UTM tags. This information forms your UTM tagging structure.
UTM tagging structure
When you pop open the campaign URL builder, you’ll see something like this:
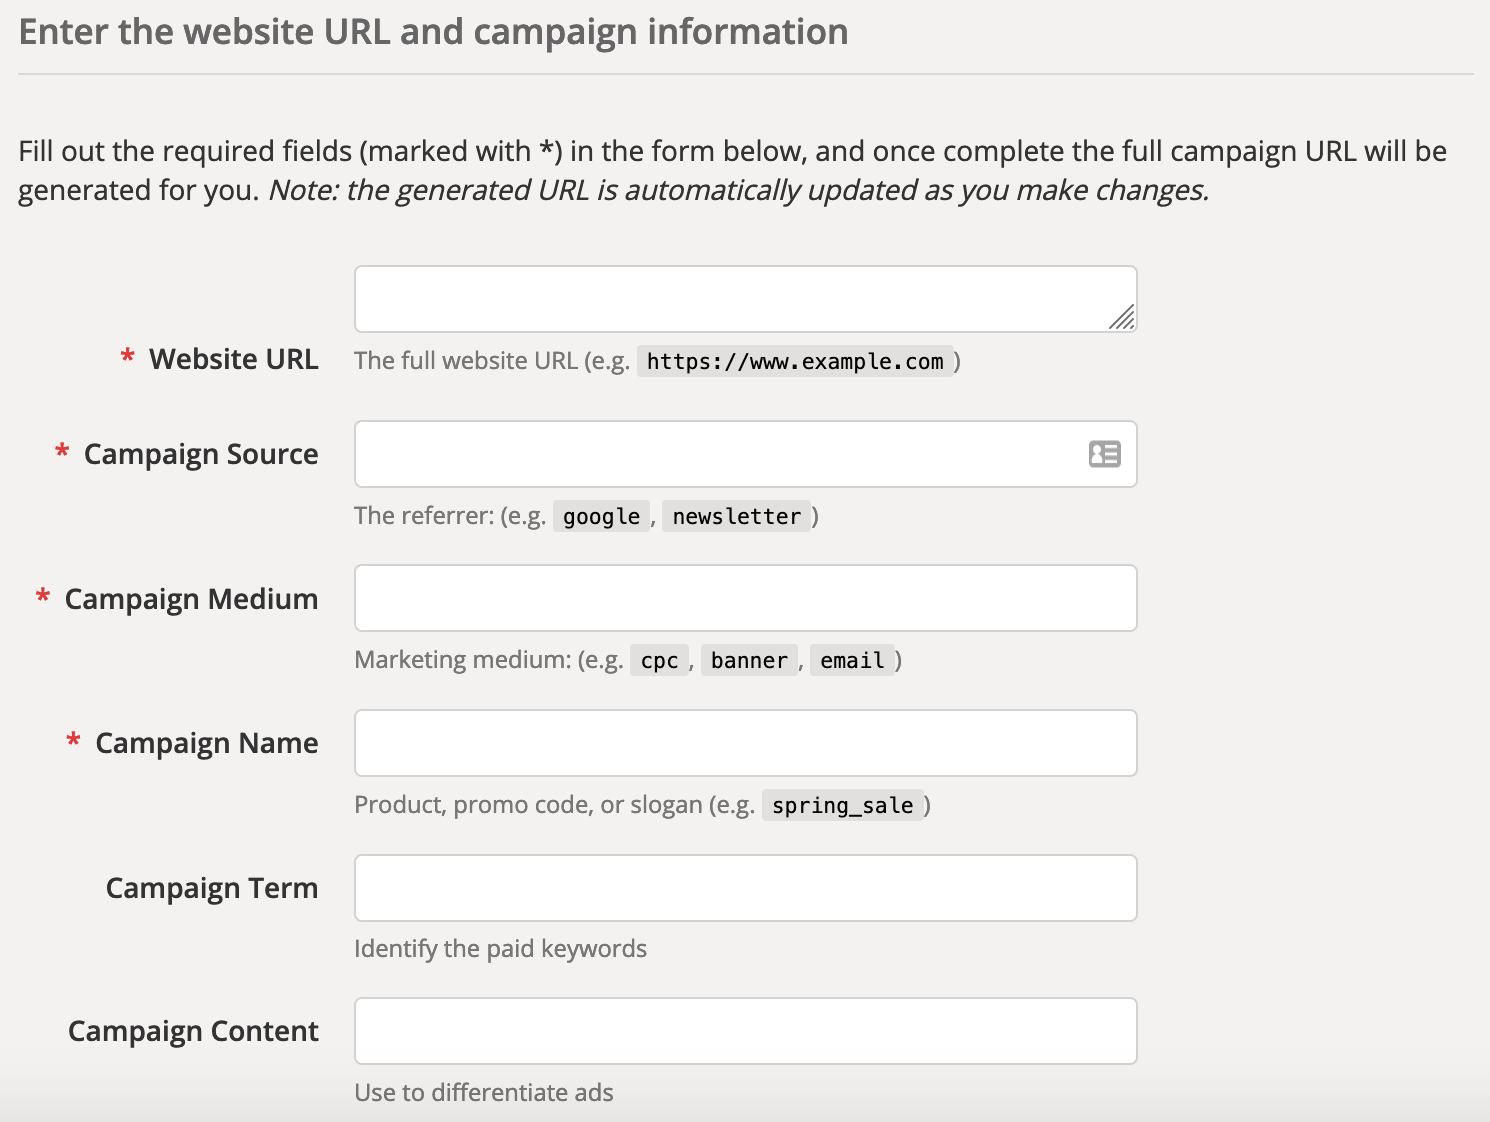
If these fields seem confusing, here’s what you need to put in each of these boxes:
- Website URL: the destination URL for the website you are linking to.
- Campaign source (UTM_source): the UTM_source is your email service provider (ESP).
- Campaign medium (UTM_medium): this is where you specify that the traffic is coming from an email. You can put “email” in this box.
- Campaign name (UTM_campaign): the UTM_campaign is the name of the email campaign or email automation the link is part of. You can pull this name directly from the email campaign or automation name in your ESP software.
- Campaign term: this field is for pay-per-click (PPC) ads. For email, you can leave this field blank.
- Campaign content (UTM_content): the UTM_content parameter is the name of the specific email where the link will be. You can also pull this directly from the email name in your ESP software.
If you have spaces in your campaign or email names, the URL builder will automatically convert them to the appropriate format for a URL. Also, the tracking parameters are not case sensitive (everything ends up being lowercase in the URL).
Once you’ve entered your tagging structure, the UTM builder will generate a URL with a UTM tracking tag, based on an internal UTM template.
Your tagging structure will look something like this:
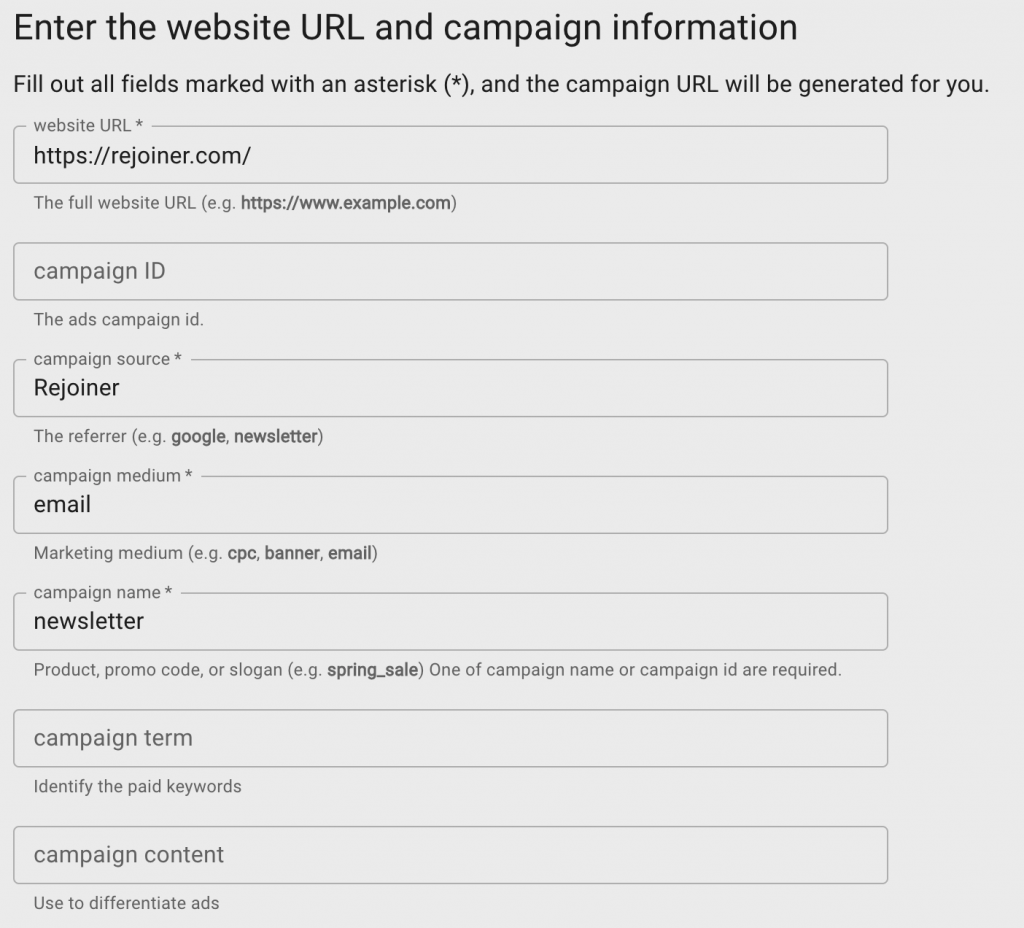
With this, the Google Analytics URL builder will generate a tagged URL like this:

This generated campaign URL tells Google Analytics which campaign and email clicks using this URL came from. Then you can track that data in Google Analytics.
Implement the tagged URLs in your current and future email campaigns
Use the generated URL as the web address for the links in the email when you build the email that you specified in the “Campaign Content.”
If you have multiple links that point to different websites in the same email, simply insert the appropriate web address in the “Website URL” field. The rest of the tagging structure will be the same, since the links are in the same email.
For email marketing campaigns that you’re currently running, you can use the web address for the existing email links in the “Website URL” field. Then use the campaign and email names in the “Campaign Name” and “Campaign Content” fields. Then insert the new URL with the UTM tag into the email to start tracking traffic from that email.
This will implement Google Analytics UTM tracking parameters into your email campaigns. Then you can start your campaign tracking and see how much traffic you get from your emails.
Track the data in Google Analytics (and export that data if you need to)
Once you're using Google UTM parameters in your emails, the campaign tracking data will get pulled into Google Analytics. Google Analytics is a pretty powerful tool in its own right. It has a lot of sorting, filtering, and aggregation capabilities.
But you can also export data from Google Analytics, if you want to use the data on another marketing platform (such as your email service provider’s analytics or CRM software). You can export any report in Google Analytics just by clicking “Export.”
This data will show you how much of the traffic on your other online marketing assets—your website, social media profile, product pages, and others—is generated by your marketing emails, and which marketing emails are supporting your other marketing channels.
That way you can make informed decisions about which emails to keep running and which emails need to be revised or stopped, and improve your email marketing ROI without fear of making costly mistakes.
Let Rejoiner handle UTM tagging for you
Does all this tagging and URL building sound like a lot of extra work? Let Rejoiner handle the heavy lifting for you. To get started, simply enable Google Analytics Tracking and add your GA Tracking ID under your account settings.
That’s it, you’re done. From now on, any email sent from Rejoiner will automatically apply UTM tagging to your links. The following structure will be used for your URLs.
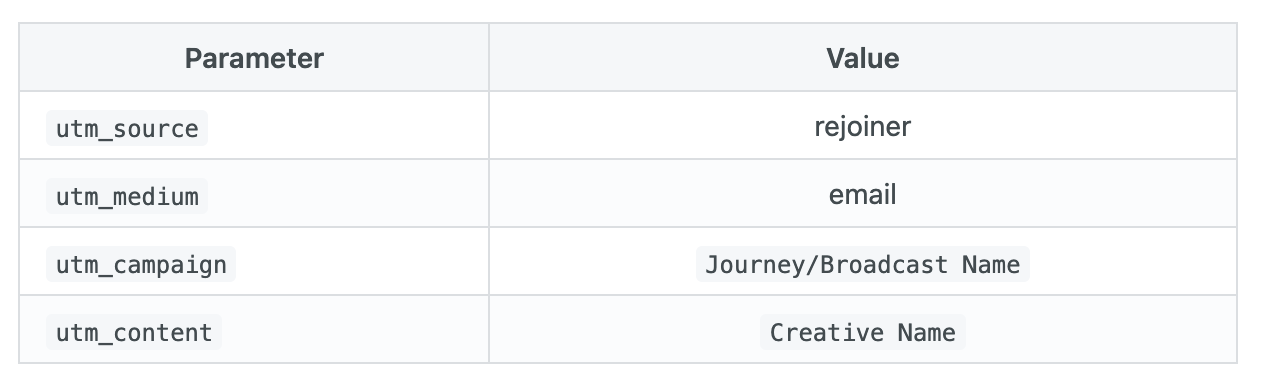
Read our Google Analytics Integration docs to learn more.
What to do now
Did this post help you improve your email marketing? Subscribe to get more articles just like this.
Or have Rejoiner handle all the setup and tracking for you, so you can sit back and enjoy your email marketing success (and revenue).

